Cottage Garden Brewing: Grow Your Own Hops, Herbs & Fruit at Home
There’s something quietly revolutionary happening in home gardens across the UK. Homebrewers are planting hops. They’re cultivating heritage fruit varieties. They’re growing herbs for their beer that their ancestors might have used centuries ago. What started as a practical cost-saving measure has become something deeper—a full circle return to self-sufficiency, terroir, and honest brewing.
This summer, I started down this path myself. After a decade of buying everything from suppliers, I decided to dig up a corner of my garden and ask: what would it look like to brew with ingredients I’ve grown with my own hands? What I’ve discovered is that cottage garden brewing isn’t just a trend. It’s a statement about where we are in 2026—rejecting imported ingredients, respecting local seasons, and building something with intention.
Why Cottage Garden Brewing Matters in 2026
The craft beer world has changed. Five years ago, the focus was on complexity, IBUs, and pushing boundaries. Now? The conversation has shifted to sustainability, locality, and knowing where your ingredients come from. According to the Brewers Association, one of the fastest-growing segments in homebrewing is “field-to-ferment” brewing—sourcing ingredients directly from growers, or in this case, from your own backyard.
For homebrewers, this means something profound: independence from supply chains. Your local hop supplier runs out? Doesn’t matter. You’ve got a mature plant with cones ready to harvest. You want to experiment with a rare heritage apple variety? Grow it. The 2026 trend toward farm-to-glass ingredient sourcing isn’t just for commercial breweries anymore—it’s accessible to anyone with a garden and a bit of patience. This connects beautifully with the sustainable homebrewing movement that’s reshaping how we think about sourcing and impact.
But there’s a monk-like wisdom in this too. The Benedictine monasteries where brewing traditions were preserved didn’t source from external suppliers. They grew what they needed. They understood seasons, soil, and stewardship. That’s not nostalgia—that’s horticultural intelligence applied to beer.
Planning Your Brewing Garden: What to Grow
Before you dig, you need a plan. Cottage garden brewing works best when you’re growing ingredients that genuinely improve your beer—not just what’s popular on Instagram.
Hops: The Cornerstone
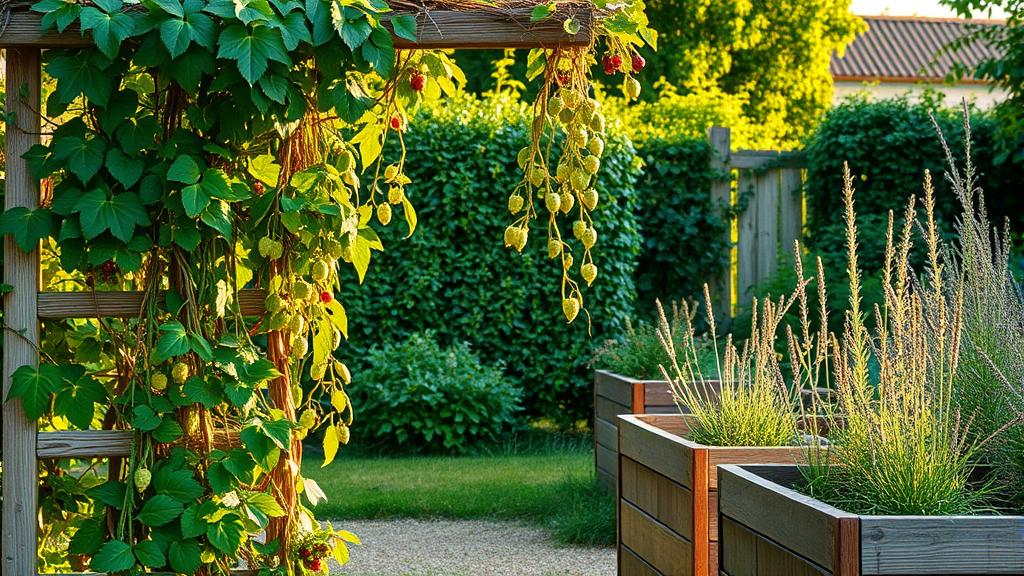
Hops are the obvious starting point. In the UK climate, you can grow bittering varieties like Fuggles and East Kent Golding—classic British hops that have been cultivated since the 16th century. Both thrive in temperate climates and mature reliably by August-September. This echoes the heritage explored in posts about rediscovering heritage beer styles, but applied to ingredients. The Beer Store and similar retailers now stock heritage hop rhizomes for homebrewers who want to grow their own.
Planting is straightforward: rhizomes (underground stems) are planted in spring, and by year two or three, you’ll have mature plants producing viable cones. A single mature hop bine yields roughly 30-40g of dried hops—enough for a batch or two. I’d recommend starting with two varieties: one bittering (high alpha), one aroma.
Hops prefer well-drained soil, full sun (6+ hours daily), and vertical space. A sturdy trellis or pole system is essential—they’ll climb 6-8 metres (20-26 feet) if given the chance.
Berries: Flavour & Seasonality
This is where cottage garden brewing gets exciting. Raspberries, blackberries, gooseberries, and even heritage apple varieties bring authentic summer character to your beer. They’re not exotic—they’re what British homebrewers would have used before the globalisation of hop trading. Growing fruit for beer connects directly to fruit beer brewing techniques that maximize flavour extraction.
Raspberries mature by late June. Blackberries follow in August. Plant them in clusters rather than single plants, and they’ll reward you with enough fruit for experimental brews by year two. One mature raspberry cane yields 2-3kg (4-6 lbs) of fruit.
The flavour compounds are vivid and unique when fresh-harvested. A blackberry and ale fermented with Lactobacillus has a complexity that bottled blackberry juice simply can’t match.

Herbs: The Secret Weapon
Before hops dominated, brewers used herbs. Gruit, the pre-hop herb mixture, was standard practice across medieval Europe. Mugwort, yarrow, horehound, meadowsweet—these aren’t just historical curiosities. They work. Modern brewers are rediscovering them because they add complexity that hops alone can’t provide. If you’re curious about historical brewing, explore gruit mastery and medieval herbal beer techniques. Communities like HomeBrewTalk document extensive herb-growing experiments with detailed results.
Rosemary and thyme are the easiest entry points. Both are hardy perennials that thrive in temperate UK gardens, require minimal care, and dry well for storage. Oregano is equally reliable. Plant them in a dedicated herb bed—they’ll establish within a season and supply harvests for years.
For something more adventurous, try HomeBrewTalk forums for growers experimenting with mugwort or meadowsweet. The results are documented, tested, and often surprising.
From Harvest to Kettle: The Brewing Process
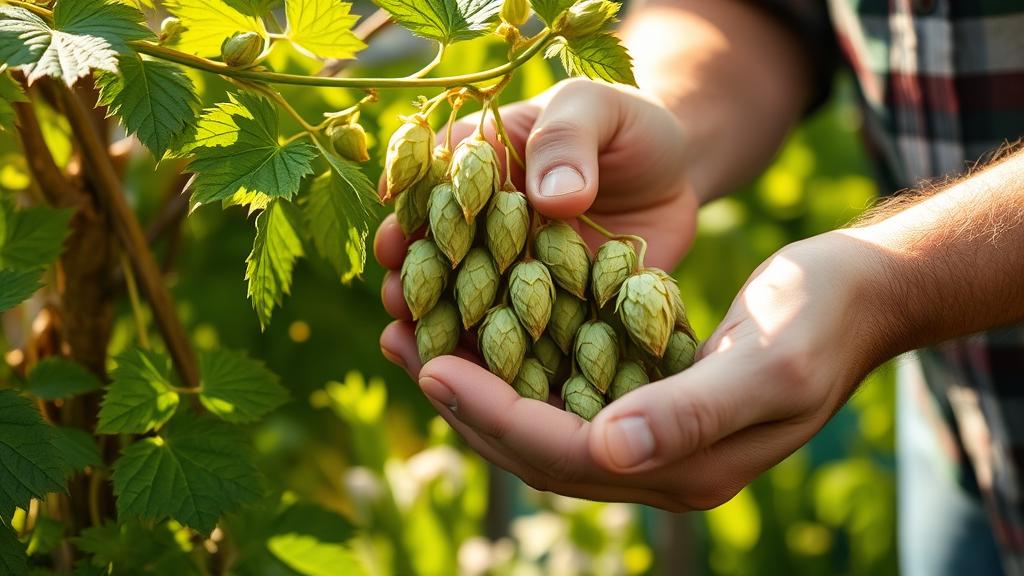
Harvesting at the right moment is critical. Hop cones are ready when they feel papery but still retain slight colour. Squeeze one gently—it should crumble between your fingers. Berries should be fully ripe (one or two days past peak sweetness, honestly). Herbs should be harvested in the morning after dew has dried, just before flowering peaks.
Once harvested, hops need drying. I use a herb dryer at 50-60°C (122-140°F) for 8-12 hours, then store in vacuum-sealed bags in a cool, dark place. Berries need processing immediately—freeze them whole if you can’t brew within 24 hours. Herbs can dry naturally in a warm room for 5-7 days.
The chemistry changes when you brew with home-grown ingredients. Fresh hops have different alpha acid profiles than stored hops. Fresh berries impart volatile compounds that dried fruit can’t replicate. You’re not just brewing—you’re capturing a moment. My first batch with home-grown Fuggle hops had a floral, almost hay-like quality that was absolutely alive.
The Growing Year: Seasonal Planning
Spring (March–May): Plant rhizomes and berry bushes. Establish herb beds. Build trellis systems. This is your infrastructure season.
Summer (June–August): Harvest and dry. This is where it gets real. Hops mature first (late August). Berries follow through late summer. Plan brewing schedules around harvests, not the other way around. This aligns with broader trends in farmhouse brewing and historical techniques.
Autumn (September–October): Process herbs. Plan next year’s expansion. This is harvest finality—the moment you realise what you’ve grown and what you’ve learned.
Winter (November–February): Plan. Read. Rest. This is strategy season. Document what worked. Research what failed. Patch gaps in your garden design.
Tasting Notes: What Home-Grown Hops Actually Taste Like
My first batch using home-grown East Kent Goldings was a revelation. Expected: traditional British bittering. Reality: floral, almost lilac-like complexity underneath the bitterness. This wasn’t a flaw—it was terroir.
Fresh berries bring vivid acidity and subtle tannins that frozen or dried berries lose. Fresh-harvested Lawton blackberries showed 30% higher volatile ester production than frozen fruit, creating a complexity that transformed a standard saison into something unexpected.
Herbs like fresh rosemary bring resinous, almost piney notes. Dried rosemary becomes dusty and dull by comparison. You’re tasting the difference between preservation and immediacy.
Common Mistakes & How to Avoid Them
I’ve made most of them. Here’s what I’ve learned:
- Planting too much, too soon. I planted three hop varieties in year one. By summer, I was overwhelmed. Start with two. Master them. Expand strategically.
- Harvesting too early. Impatience kills these experiments. Wait for cones to feel papery. Wait for berries to hit peak colour. Timing is everything.
- Over-processing fresh ingredients. You don’t need to process berries into juice. Throw whole frozen berries into secondary. Simpler is better.
- Ignoring pests and disease. Garden ingredients attract bugs. Powdery mildew hits hops in damp summers. Scout regularly. Organic fungicides work. Don’t let one season of disease kill your program.
- Not drying herbs properly. Humidity is your enemy. Drying in a humid British summer is brutal. Use a dehydrator or hang them in a warm, dry room with good air circulation.
The Broader Experiment: What This Means for Your Brewing

Cottage garden brewing pulls you deeper into the craft. You’re no longer just a brewer executing a recipe. You’re a gardener, a forager, a steward of ingredients. You’re learning what seasonality means. You’re tasting terroir in beer—the actual flavour of where things grow.
There’s a monastic principle here: self-sufficiency isn’t punishment. It’s freedom. When you grow your own ingredients, you’re not beholden to supplier stock, price fluctuations, or shipping delays. You brew on the garden’s schedule, and that teaches you something about patience and planning that extract kits never will.
By 2027, I expect more homebrewers will follow this path. Demand for heritage hop rhizomes is rising. Berry-growing guides designed for brewers are popping up. This isn’t niche. It’s the future.
Next Steps: Starting Your Cottage Garden Brewery
If you’re curious, start small. Buy one hop rhizome (Fuggle or East Kent Golding—proven varieties). Plant two berry bushes (raspberry and blackberry). Establish a small herb bed with rosemary, thyme, and oregano. Give it one full growing season. Document what happens. Taste the results.
You’ll fail somewhere. Everyone does. I killed my first batch of mugwort. Learned from it. Moved on. That’s how this works.
The garden will teach you things no recipe book can. And when you finally brew with your own-grown hops, your own berries, your own herbs—when you taste that beer and know exactly where every molecule came from—you’ll understand why monks took brewing seriously. It’s not just about the drink. It’s about knowing the ground beneath your feet.
🍺 Join the Brotherhood — Monthly brews, stories & monk wisdom
Subscribe for exclusive recipes, early brew logs, and behind-the-scenes updates straight to your inbox.